Showing posts with label cooking gadget. Show all posts

Thursday, December 24, 2009

Coconut Chutney - Dosa- Idli Photologue

article by Jennifer Kumar
photos: Krishna Kumar


...A nice, sour fermenting smell pervaded the entire home as I lifted the cover from the idli-dosa batter! What a nice pre-Christmas gift. This time, I deviated from the regular 3 cups idli rice/1 cup urad dhal with 2 cups long grain rice from the Mexican store and 1 cup idli rice to 1 cup urad dhal, nicely ground with a few fenugreek (methi) seeds and a dash of salt. Though it's freezing out, and the floors and tabletops are colder than in the summertime, I wrapped the batter bowl in a towel and set it on the floor by the furnace heater vent. In about 36 hours, I welcomed this wonderful present! I knew my happiness would bound more once hubby would get to eat some crispy dosa on his first holiday from work for Christmas break.

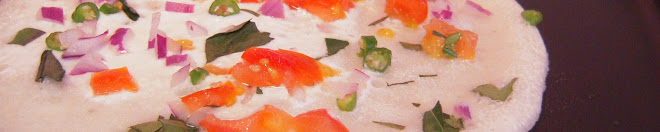
...The process of making dosa and idli batter has been a difficult one for me. It's taken me more than four years, and three blenders to get the right methods. What was once cumbersome in planning, blending and fermenting- let alone getting the right pressure while ladling and forming dosas on the hot pan, is now almost effortless. For me, it's really a big accomplishment. My main motivation and inspiration to make dosas, and masala dosas come from Maya's Kitchen. Once, when we dropped by, she left a long lasting impression on me. The way she formed each dosa on the pan, spread the dosa podi on the crisp dosa while rolling in the potato curry- as a one woman assembly line feeding over 10 people left me in awe. I thought, "Would I, could I ever be so efficient at making dosa?" This experience came to me at a time where dosa batter once ladled onto the pan would just end up in a sloppy, gooey, mountain mess on the pan- so I stuck to making idlis instead while hubby effortlessly made and attempted to show and teach me the right way to spread dosa batter on the pan. So much to learn- especially in the grace required to press with just such a delicate force to assure the batter is spread in almost a spiral pattern, but that the batter remains on the pan, and we arI survived this...e left with a nice, crispy, almost paper-thin dosa. I started with idli, moved to utthapam (a thicker dosa topped with chopped veggies, pictured, right), and recently as of this year started making the paper-thin variety. I still have a way to go to perfect my talent, but I know I am on the right track!

But, idli and dosa can not be eaten alone. They are always accompanied by something- dosa podi with oil, a variety of chutneys, sambar, [Indian] pickles, and many other sides I have yet to discover. On hot days, somehow I like to eat Tomato Chutneyidli with yogurt as a plain dish- no spices, which is good on the stomach. I prefer to eat other's homemade prepared dosa podi (powders made with roasted spices and lentils), which I mix with sesame oil, and hubby mixes with olive or vegetable oil. For chutneys, I make tomato (photo, right), onion or coconut chutney. If we have left over idlis, later I will take, cut them and make an idli upma (dry fry of idli pieces mixed with tempered curry leaves, mustard seeds, urad dhal, and few other spices, similiar to Quinoa Upma, with idli pieces instead of Quinoa).

For those new to this cuisine, idli are steamed cakes made from the batter that dosa is made from. Some purists may actually make two batters- the idli batter and dosa batter- with a slightly different proportion of rice to urad dhal. I don't do that- too much work right now! idlistandThese cakes are steamed in an idli pan set into a big pressure cooker. I usually steam it for about 20 mintues. However, last night I tried something new- I steamed them in a egg poacher. This cooking gadget is a more western contraption and is more easily available in America than idli pans, and pressure cookers (though pressure cookers are available in American stores, most Americans do not use pressure cookers). I steamed four idlis in the egg poacher last night. The final product, after 20 minutes of steaming is a cake a bit thicker and not as wide as the ones made in an idli pan, so they are actually a bit more filling per idli. However, we realized, it needs to steam a bit longer. Maybe next time I will leave it in there about 25 minutes- the middle section was still a bit uncooked, but edible.

Recipes:

Idli/Dosa Batter
3 cups rice
1 cup urad dhal
1 tsp methi (fenugreek seeds)

Method:
1. Soak rice and dhal in separate bowls for about 6 hours. Soak the fenugreek seeds in with the rice.
**If you are curious what rice to use, I usually use 'idli rice' available at the Indian store. If I don't have that on hand, I use 'ponni rice' also available at the Indian store. However, if you have no Indian store nearby, you can use long grain rice, that works well too.
2. Puree the rice separately and dhal separately, with little water. The consistency should be like pudding/thick pancake batter.
Blending the dhal is usually easier than the rice. Dhal will easily and quickly blend and puree. Check with your finger in between, before taking out of the blender. Take a bit of the batter between your thumb and forfinger, rub your fingers together, you should not feel any lumps or grains. It will feel 'like satin', smooth and velvety.
For the rice, it is a bit more tricky. The best batter is made by pureeing the rice separately from the dhal, because to get this velvety feeling from the rice, it takes a bit longer to blend. While urad takes about 3-5 minutes to get velvety smooth, rice may take 5-10 minutes depending on your blender's power. When you check the rice in between for smoothness, the graininess will decrease. Also, as one blends the rice, the batter thickens as the mixture becomes more velvety. Hope that makes sense! (Fenugreek seeds will be pureed along with the rice.)
3. When both urad and rice have been pureed sufficiently, mix these two purees together in a big bowl. Make sure there is room in the bowl above the line of the batter, to give room for batter to rise. Blending will take anywhere between 15-30 minutes.
4. After mixing the two batters, set this bowl aside for one day to two days depending on the climate. Some people suggest having the batter in a metal or glass bowl and keeping in the oven with the light on (no heat) for fermenting. I have not done this. I usually put the mixture in a plastic bowl, twice the size of the batter, assure the lid is on tightly, wrap it in a towel. If it is summer, I put it on the counter top for 1-2 days. In winter, I wrap the bowl in a towel and place it on the floor on a blanket in front of the heater vent for 1-2 days. I check the batter at intervals of about 12 hrs, 20 hrs, 30 hrs, etc or whenever I remember. Batter is ready when the lid is removed and a sour aroma hits you in the face and when the lid is fully taken off, the batter has mushroomed up- it is fermented and risen. Timing for this is between 15-48 hours depending on climate conditions.
5. Batter should be a pouring consistency to make dosa or idli. The consistency should be like a milkshake- thin, consistently smooth and pourable. Sometimes when the batter ferments and rises, it also thickens. It is important to add water little by little to get the batter to the right consistency. Some will take water in a bowl, dip fingers into it, and spray water with fingers little by little into the batter, mixing it with a spatula or fork until the right consistency is attained.

Wondering how many servings this batter makes? I am really not sure! It lasts us about 2-3 days of idli dosa making. I eat between 3-5 idlis, and he eats about 3-5 dosas. Roughly one ladle is one serving (1 ladle batter=1 idli= 1 dosa). If I make an educated guess, I'd say between 12-17 servings of idli/dosa from this batter.


How to fry/make dosa
If making dosa, the pan must be very hot. So hot that steam will be seen rising off the pan, even when frying, as to the right. (Click on all photos for bigger sizes.) Some take the pan off for a f...ew seconds before pouring batter on it. A ladle of batter is put on the pan and in concentric, even circles the batter is made into a thin pancake. Dripping a little oil around the sides of the dosa is important to make it crispy. Keep the heat on high, and watch the dosa. When it is first put on the pan, good batter will bubble and bubbles will burst as it fries. Usually we do not flip for about 5-6 minutes. To know when to flip, it would be possible to see the browness of the bottom coming through to the top, but not blackening or burning. When it is time to flip, taking the spatula around the 'edges' it would come off easily when the bottom has browned slightly. Flip and fry a bit on the other side. Do drip oil around it and move the pan around to get the oil to go under the dosa. This is not deep frying- a lot of oil is not needed- about 2-3 teaspoons per dosa is used. Some people may use more to get it a bit more crispy and brown. It is imperative to use oil to get a true taste out. The few times I tried to make a 'diet dosa' I realized it just wasn't worth it!

From Vegetarian Cuisine
How to make/steam idlis
If you have the Indian utensils, oil the idli pan and put about an inch of water in the bottom of the pressure cooker and heat the pan. Place batter in each oiled idli mold about 1/2-3/4 full. Place the idli stand inside the pot. Put the top on, do not put the weight on the pressure cooker. Once steam comes from the top, time it for about 20 minutes. Take out and enjoy!

How to steam idlis in an egg poacher pan
This method is similar to the above. Take each egg poacher insert, oil it, and fill it about 1/2-3/4 full with the batter. Steam on high heat about 25 minutes.


...
Close up of Idli
fluffing up in poacher pan.

...
Pan view.


Making Coconut Chutney Side Dish:

This two step coconut chutney recipe is so easy. It was taught to me by my father-in-law.
...
Step 1:
1/2 cup grated coconut
2 tbpsn chenna dhal (uncooked)
2 green chilies
dash salt
1/4 cup water

Place all these items in a blender and puree it. It may become thick, add 1/8 cup more water. Some people like the chutney thick, others more watery. The dhal would take some more time to puree. If you want to make it a bit easier to blend, soak the dhal separately in water for about 30 minutes before blending.

Place the pureed coconut mix into a serving bowl.


Step 2
Oil
pinch black mustard seeds
10 curry leaves
2 green chilies cut lengthwise
2 dried red chilies broken in half
1 tsp urad dhal

Take a small frying pan. Heat it. Put in the oil (about 2 tablespoons). Heat the oil. Put in the mustard seeds. Take care, when they heat they will burst out of the pan. This is important to get the right smell and taste.
When the seeds have burst, slightly move the pan up off the flame/stove and add in the other spices, temper them a few minutes until the urad dhal seems brown, not black. When it's ready (only takes about 2-3 minutes) put this mix on the top of the coconut mixture already in the bowl. Though it looks nice sitting on top of the coconut, as in the photo, do mix the spices into the coconut puree and sit aside for 10-20 minutes to let the flavors mix. It's so tasty!!

**I like to take the green chilies, urad and red chilies and put them in a small bowl so when oil and mustard seeds are ready, I can just drop the whole thing right into the pan!


Related Posts/Sites:
Maya's Kitchen- My local friend's vegetarian and non-vegetarian delicacies
Pongal Holiday Potluck Menu and Recipes
Quinoa Upma
Raw Onion Chutney
Stovetop, electric and microwave egg poachers.
Tomato Chutney by Nithya

Thursday, July 9, 2009

Create your Indian Inspired Kitchen in America!

From Vegetarian Cuisine
Many recipes from India can be made using everyday cooking utensils that Americans use for American cooking in their kitchens. However, there are some special utensils that can be added to the kitchen to make Indian cookery easier or more authentic tasting. I am offering below a store with a wide listing of utensils, gadgets and appliances I use to make Indian food in my kitchen in America. It is not exhaustive as Amazon has yet to add things like idli pans (right), tumblers,
From Vegetarian Cuisine
south Indian coffee filters, chapati tawa, dosa griddle, dhokla pans, Indian size and shape metal and wooden frying utensils, and more regional items like the Kerala chirattu puttu maker (right) or the tubular puttu maker. Luckily for some items, American utensils can be replaced- such as for dosa griddle or chapatai tava, we can use a regular frying griddle pan. It would cook differently and sometimes better on the Indian made ones, but we can get a good outcome with the American cookery gadgets, too.


The most popular dish of south India is the dosa or idli. This is made by soaking rice and dhal, then grinding into a fine paste, and setting out about eight hours in a good, hot climate to rise and ferment. It is either placed in the idli pans (above) and inside a pressure cooker with water (no weight), or in a special idli steamer, or spread on a griddle just like any American pancake. In the past I have used American blenders like Oster, and the Magic Bullet (which I also used to grind dosa powders and masalas or curry powders) with descent outcomes. However, it was only when I purchased the Butterfly mixie grinder, the results have been outstanding.


Here are a few other American bought items I have integrated into Indian cookery:
The Oxo Good Grips 3-Inch Mini Strainer, I have used to strain tea leaves.
To strain pieces out of oil after making pakodas, bondas, vadas, I use the Norpro 5 1/2-Inch Stainless Steel Funnel .
When I buy those huge bags of Ponni or Idli rice, I store it in these large Sterlite Locked lid containers.
Likewise, I like to store dhals, dried beans like chole, rajmah (kidney beans), kadala, and even flours, like rice, maida, atta and besan in lock and lock boxes or sterlite lock lids, smaller size boxes.
I have started to grind dosa podis, currys, masalas, spice mixes and sambar powders in the Butterfly mixie grinder. However, before I had this, I used a coffee grinder and a mortar and pestle with descent results.
Pressure cookers are used for many items in Indian cooking. I have a small Hawkins Aluminum Pressure Cookers - 1.5 Liters cooker, I like to make small quantities of dhal and chole masala. For making sambar, larger quantities of dhal, steaming dhokla and idlis, I use a bigger PRESTIGE POPULAR- 6 Liter Pressure Cooker. Though you can use a pressure cooker to make rice, dhal and steam veggies all at once by adding in pressure cooker insert pans, one can also make rice and steam veggies in this handy dandy Joyce Chen 4 in 1 Microwave Rice Steamer. I read the directions say popcorn can also be made in this! Have yet to try. Another option for making rice is an electric rice cooker.


If you're looking for a pot with a dual purpose of cooking and serving sambar, stew, pongal or similar dishes, try the pot to the right! I got it a few weeks ago, and love it! When I saw the pot, I wanted to go back again and again for more sambar, mostly because the pot is so cute! I like how the pot handle's have a silicone coating on the inside part (think that is it). Because of that I did handle the pot without potholders.


These are just a few ideas I have experience with. I would like to learn more. If you have creative solutions to integrating American utensils into Indian cooking, please leave your comments below. I really appreciate you reading my blog and sharing your thoughts and experience with me!!


To see this store in another browser, click here (the code given overflows this frame)

Wednesday, June 11, 2008

Chiratta Puttu with Kadala

...Chiratta Puttu with Kadala is steamed rice powder with coconut and ghee steamed in a replica of a coconut shell (chirattu puttu) with a stew of spiced black chickpeas (kadala). This is also known as puttu kadala.

I have tried and tried many a time to make puttu (steamed rice powder with coconut gratings) and kadala over the years in our 'trusty' puttu kutty. (See what I am talking about here.)

In fact for the puttu it was a faulty puttu kutty- nothing could cover the gaps where steam was being released... But as for the kadala curry, it has to be a user error! I had not left it in the pressure cooker long enough and like with things that take too much time, I probably just missed it by a little time due to impatience.

So, now instead of that puttu kutty maker, I have a chirattu (I think that is what it is called). This is a small steel bowl with a loose fitting metal top that goes on top of the pressure cooker where the weight goes. This is meant to be a reusable replica of a coconut shell. Practically, this is able to be flown out of Kerala on a plane, unlike the coconut shell!

In my search for a photo of the puttu kutty, I found a post on making puttu in a 'homemade' steam contraption. This innovative approach by inji pennu makes puttu making fun and easy for anyone (especially in America) who has access to only local products and not Malayalee cooking utensils. See Inji Pennu's blog here.

This time, I vowed I'd be patient from the moment I began soaking the brown kadalas (chick peas) to the very end of steaming the puttu - and the result was very nice.

I have adapted this recipe from Annita's website and from recent cookery lessons on our trip to Kerala!

Kadala Curry

Ingredients:
1 cup dried brown chickpeas (known as kadala)
1 cup coarsely chopped onions (I used red onion)
1 cup coarsely chopped tomatoes
2 green chilies sliced lengthwise but not fully chopped in half
1/2 tsp ginger paste (or alternatively you can use a few chunks of fresh ginger)
1/2 tsp garlic paste (or alternatively you can use a few cloves of crushed garlic)
pinch cumin seeds
1/2 tsp red chili powder
1 tsp coriander powder
1/8 tsp turmeric
pinch ing (optional)
salt to taste
1/4 cup grated coconut
4 tbspn Olive or Vegetable oil (I used olive oil)
10 curry leaves
pinch mustard seeds

Method:
1. Soak the kadala beans overnight. This time I actually soaked them until few beans broke open and revealed their white inner core.
2. When kadala has soaked properly, take a pressure cooker and put it on high flame.
3. Add 3 tbspn oil oil. Temper the cumin in this oil a few minutes when it becomes hot.
4. Turn down the heat to medium and add the onions. They should 'sweat'. I did not fry till brown.
5. After about 5 minutes, add the tomatoes and green chilies and stir.
6. Add the ginger, garlic, turmeric, red chili and coriander powder and stir.
7. After the contents of the pan have been sufficiently covered with the spices, add the kadala beans. Add three times the water as the measured soaked beans*, ing and salt to taste. (I did not measure the salt, I poured it in, but it's better to add less salt and more can be added later.)
8. Turn up the heat to high, put the top on the pressure cooker along with the weight. Pressure cook for about 4-5 whistles. (I was told to do 4-5 whistles, but my whistler is broken I guess as it went off only twice in the span of an hour and a half, so it basically boiled a long time. So at this time I took off the lid and tasted it. You know it's done when the beans are medium soft. The beans should not be so soft they can be mashed. Slightly hard is best - it's at least what we like!)
9. When this part is done, take 1/2 tspn oil and heat it on a frying pan. Add the coconut gratings and brown them. Set them on a plate to cool.
10. In that same skillet after cleaning out the coconut pieces, heat 1/2 tspn oil and add mustard seeds. When they pop, add the curry leaves. Fry about a minute. Add to kadala pan. Take a ladle or two of the kadala water, put it in the skillet and pour it back into the kadala pan. This actually helps you to collect all the tempered oil taste of mustard seeds and curry leaves.
11. When coconut has cooled, put it in a blender along with two ladles of the kadala (take whatever the ladle has in it- kadala, water, onions, tomatoes, etc.) and blend it so that the coconut pieces become pureed in this. Add it back to the kadala pan.
12. Reheat this kadala to be eaten with the puttu.

Puttu
Ingredients:
2 cups roasted rice flour (you can buy this ready made at the Indian store, called puttu powder or puttu podi)
1/4-3/4 cup water
pinch salt
1 cup coconut gratings

Method:
1. Before making the batter, fill a pressure cooker 3/4 with water. Put on the top, but do not put the weight on. When steam starts to come out of the top, you can put the chirattu on it.
2. The trick to making good puttu is mixing the puttu flour with the water. Put all the puttu podi in a bowl.
3. Measure the water, mix the salt into it.
4. Mix all this with your hand. Little by little with your left hand pour few drops of water into your right hand. Mix it into the puttu podi. By 1/2 a cup of water the flour will start to get lumps in it. Sometimes depending on the brand of puttu podi, this may be enough water. With the brand I used I had to go to 3/4 cup water adding little by little and mixing with hand. The final product will be lumpy but not doughy. If you put the puttu mix in your hand and make a fist it will stick together but it will not be wet. It will be dry and it will crumble apart. This is what you want. It may be hard to get this done using a spoon. It's better to use your hands.
5. In your chirattu puttu (pictured above) put a layer of coconut gratings to cover the hole in the bottom that will let steam in. Then add the puttu podi you have prepared. Put the top on the chirattu puttu and put it on the pressure cooker where the weight was.
6. Once steam starts coming out of the top of the chirattu puttu, wait 6-8 minutes. Remove and it should be able to be tipped upside down onto a plate to give you a bowl like shape. It should not fall apart.

Eat with the kadala curry on the side.
Some like to break up the puttu cake and add sugar or jaggery on it. Jaggery can also be added into the puttu podi while steaming it. Add as per your own taste.

In case you don't have kadala curry but still want to eat the puttu, put it on your plate, crush it, add ghee (clarified butter, or melted butter), sugar or jaggery per taste and bananas (optional).

This is a typical breakfast in Kerala, India. The puttu eaten with sugar and banana can be called common man's food as it is easy to make and not many ingredients is needed to make it.

*Once the beans soak they get a little bigger. Put them in the measuring cup and see how much it is and add three times this amount of water. You can add twice the amount of water also for less watery gravy. I like to put more water to get this 'kadala water' that can be added to plain rice and is very tasty!


Nice video showing the use of coconut shell!


** Chirattu Puttu is a famous breakfast dish in Kerala (South west India). It is steamed rice powder with coconut and salt. Generally puttu is taken with kadala is a savory dish. However, if no kadala is available, one can eat the puttu with butter/ghee and sugar and banana if desired. This is like a Kerala 'corn flakes' without milk!

**Kadala is a stew made from "black chenna" or black chickpeas, also known as kadala. This dish is famous in Kerala. Generally these two items are taken together. However, Kadala can be eaten with rice.

Monday, January 21, 2008